Between work and gaming at home, I spend a lot of time on my computers. Because of this, I like to personalize my PCs to suit my style, both organizationally and aesthetically. There are tons of awesome apps for both in the Object Desktop Suite, but I want to focus on aesthetics for today. So, let’s talk about how to get the most out of DeskScapes!
Get DeskScapes here.
Tip #1: Visit WinCustomize
You can actually create your own “Dreams” and wallpapers with DeskScapes (more on that later), but a good place to start gathering some for your desktop is WinCustomize. There are thousands of wallpapers and animated Dreams to choose from there and it caters to a very wide variety of tastes. If you enjoy theming your desktop to certain holidays, there are lots of options for all times of the year!
Start browsing DeskScapes Dreams here.
Downloading a wallpaper or Dream is extremely easy. Simply select the one you’d like and click the download link. Once it’s complete, you can either click on the download itself and it’ll apply to your desktop, or you can find it within your Deskscapes menu, along with some additional customization options.
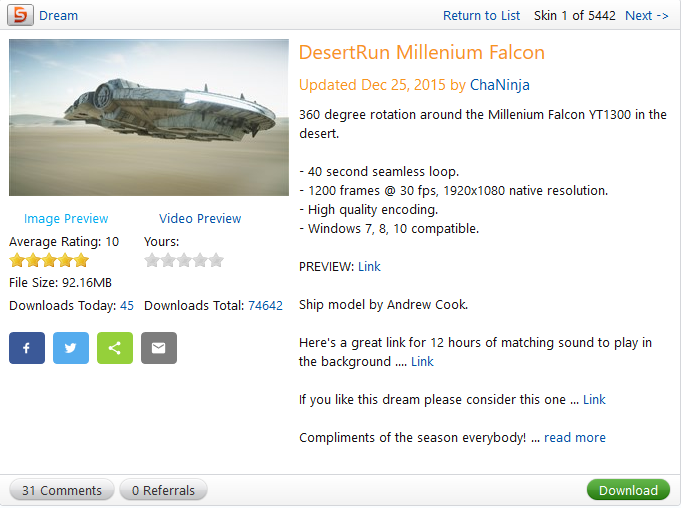
Pro Tip: To get the most out of WinCustomize, please make sure you create an account! You can subscribe to WinCustomize for no ads, unlimited downloads, and other benefits as well. If you’ve purchased a product that utilizes WinCustomize, you’ll have unlimited downloads for a year.
Tip #2: Adjust the Background Settings
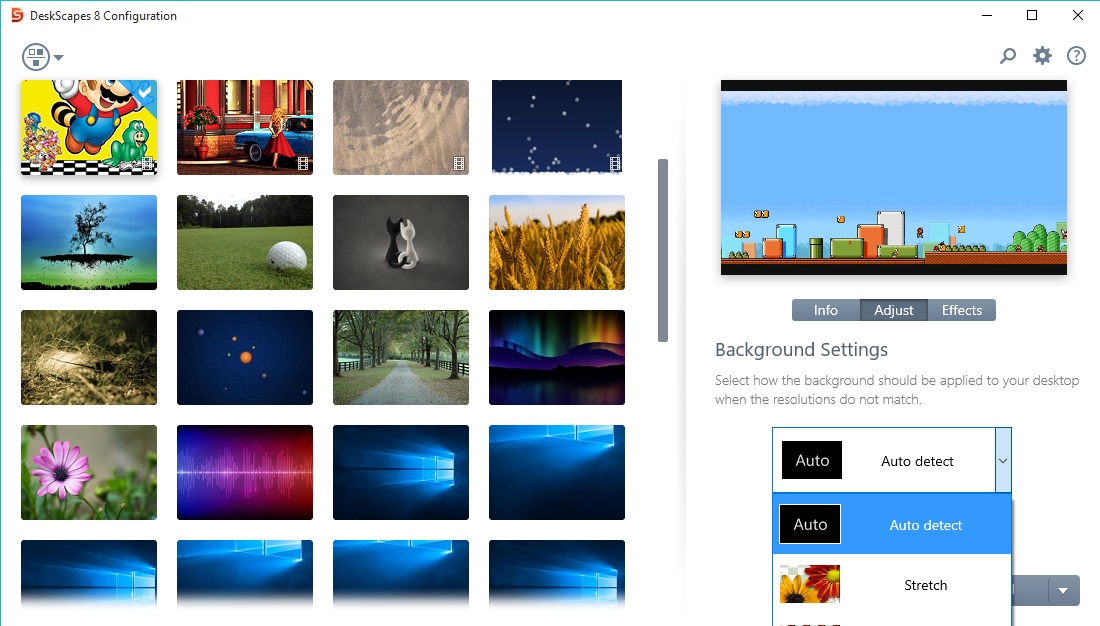
Once you’ve selected a Dream or wallpaper, you can customize it to suit your desktop. Click on the “Adjust” tab in the DeskScapes menu to choose your background settings. You can assign the dream to a specific monitor, meaning that if you can’t decide between Dreams, that’s ok -- you can assign a different one to each monitor for a variety of looks! You can also set how it appears on the screen (stretched, tiled, centered, etc.).
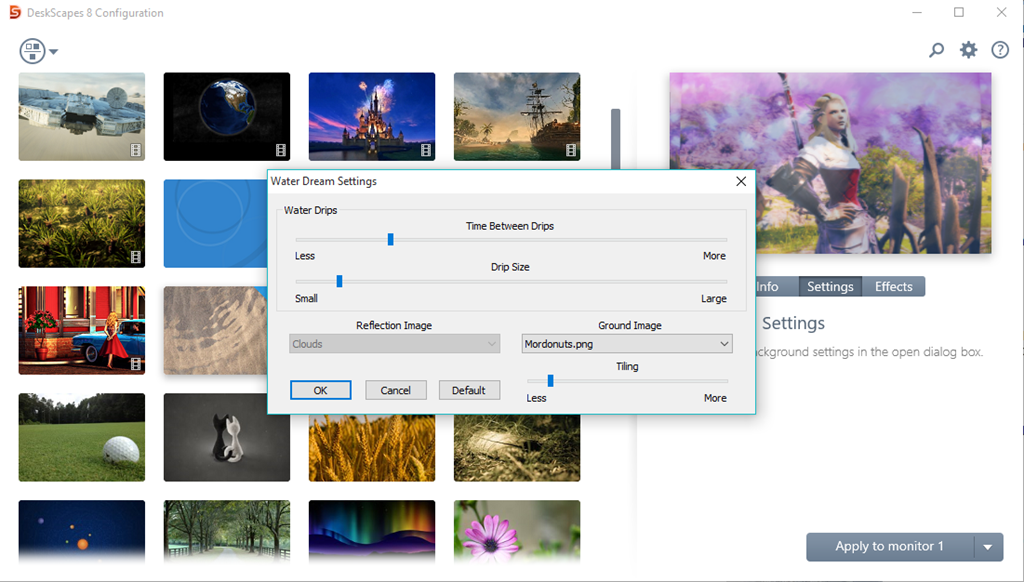
Pro Tip: Some dreams have effects that you can apply your own background to! Instead of an “Adjust” tab, you’ll see one that says “Settings” instead. Clicking on that will lead you to a secondary menu that will let you choose a picture saved on your PC to use with the animated effect. Try it out with “Water Dream” by Stardock Design (it is automatically included in DeskScapes).
Tip #3: Apply Effects
Once you’ve chosen your Dream(s), you can further customize them by going to the “Effects” tab for that Dream. There are dozens of options that will let you alter the Dream to suit your style! You can change it to black and white, add colored filters, textures, mirror effects, and more. If you’ve chosen a wallpaper, there will also be a tab for color adjustment and saturation available.
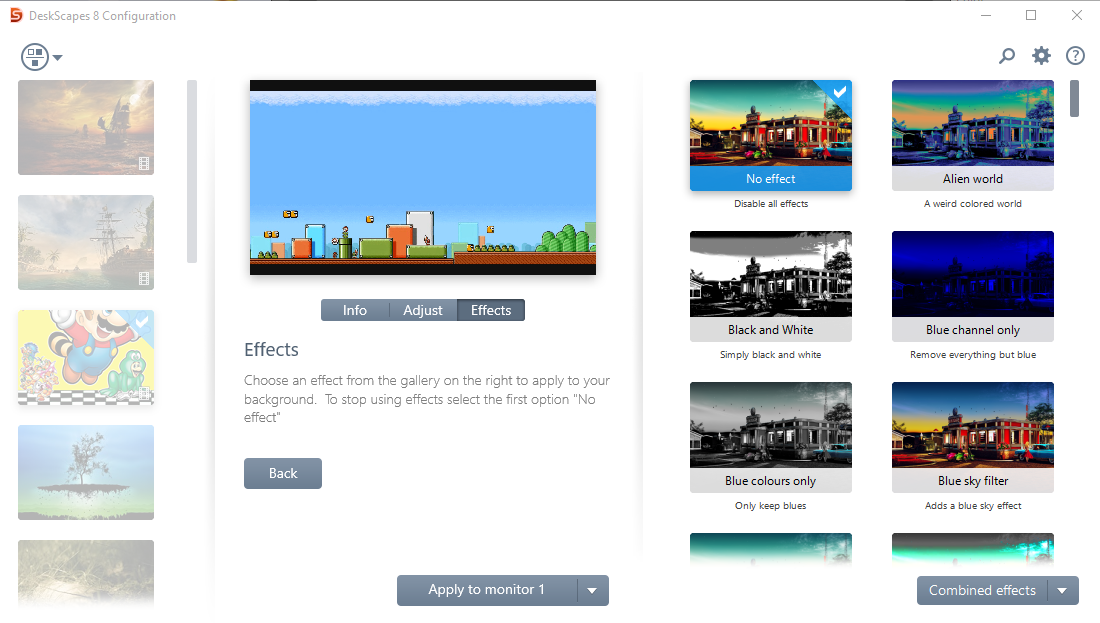
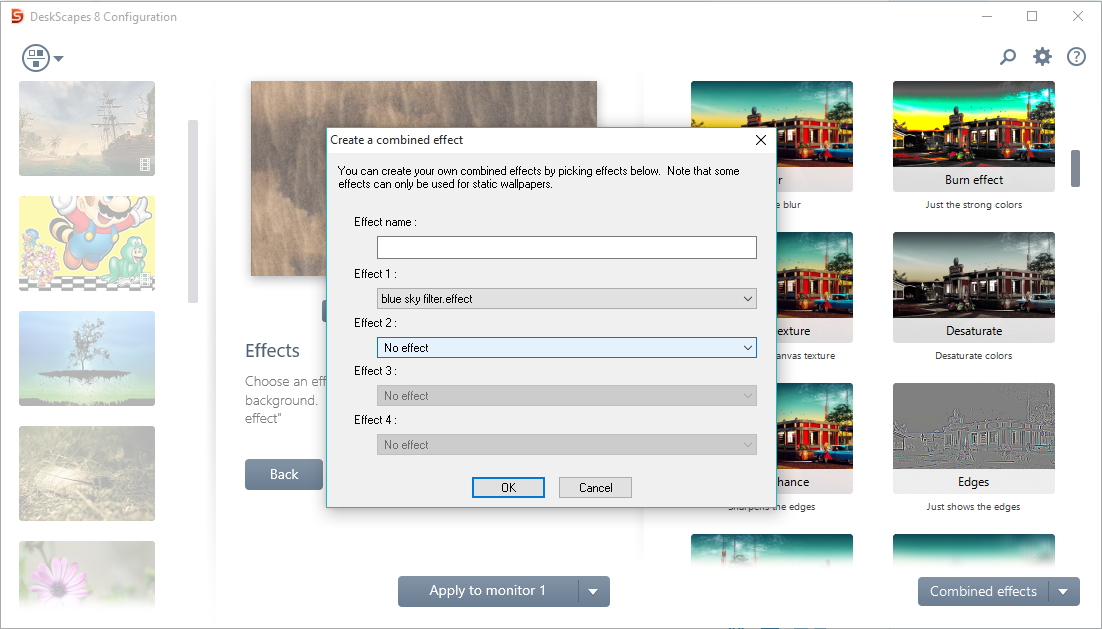
Pro Tip: You can combine different effects to make up your own! Click the “Combine effects” menu at the bottom of the menu, then choose “create new combined content.” Give it a name, choose the effects you’d like to combine, and then save it. It will remain in your menu as an option for future applications.
I hope you get a chance to explore DeskScapes and browse the thousands of options available to you over at WinCustomize! Get access to unlimited downloads on WinCustomize and a bunch of other awesome desktop enhancement programs by becoming an Object Desktop member today.